Monday, May 4, 2015

Rainbow Dress Quick Tutorial

My Rainbow Dress


Hello all!  I've had a few requests asking how I've made this dress so I figured I could just write up a quick tute and then you'd all whip up some dresses! :)

A Few Notes Before We Begin
This tutorial is written with the assumption that you know how to sew.  I do apologize for that, it's just that I am short on time!  Please feel free to leave a comment if you have any questions.  It's really quite simple, I'm just making it sound more difficult!

All of your seams should be finished.  I do serge them but you can also zig zag or use pinking shears.  In addition, with this particular dress, each seam of the tiers (except for the waist) are all pressed downwards and then top stitched.  I find this gives the dress a much more professional appearance and it holds its shape well when washed and doesn't need to be ironed (much!).

There are basically two parts to this dress: the bodice and the skirt.  For the bodice, it's easiest to use a pattern that you have lying around, but if you don't you can always make your own.  I wanted the bodice to be straight across so I took a few measurements of each kid.

You will need the following pattern pieces:
1. bodice front  (and lining)
2. bodice back (and lining)
3. straps.  ( a basic rectangle that I think I cut 18x 2 or so)  this you can eyeball.  :)  Also, I'm not including how to make straps because it's fairly straightforward- sew 3 sides, turn right-side out.

You will also need elastic, about 1 or 2 inches less than the width of the child's back.

If you don't need to make the bodice, skip on ahead to The Tiers section

The Bodice and Lining

To make the bodice you will need the following measurements:

1. All around the chest. (mine was 24")
2. from the center of the chest to just under the arm, where you want the BOTTOM of the BODICE to go. (6.5" for mine)
3. from the center of the arm to where you want the bodice to end on the TOP.(4" for mine)
4. From the center of the chest straight up to where you want the top of the bodice to be.  (4.5"for mine)

Let's Begin!
Once you have all of those measurements you can draw yourself a pretty little pattern.  MAKE SURE YOU ADD SEAM ALLOWANCES!!  For these dresses I used 1/2" because I'm a fairly sloppy sewer and I need lots of wiggle room. :)   Just connect the top line to the bottom line in a curvy little line.  :)


  You probably can't see that very well so let me explain.  You place the right side on the fold. The left is where it will go under the arm.  And then you cut another one so you'll end up with two (for the lining).   For the back, I just arbitrarily added a few inches to allow it to get over the arms/shoulders.  And, I just made a rectangle.  If you look at the pattern above, the side under the arms is about 3" so my back bodice ended up being a 3 x 18" rectangle. Cut 2 of those suckers too.

1. First, make your straps. 

2. I will now attempt to explain how I sewed the bodice together.  I didn't think of a tutorial at the time so I don't have very good pictures!  (yikes!)  I took the two bodice front pieces and placed my straps where I wanted them to be, pointing down, sandwiched in between the bodices. Then I sewed around the armpits and top edge only of the two bodices.  The I turned it right side out and TOP STITCHED where I just sewed.

3. Then, sew the top seam only of the 2 bottom back pieces. DO NOT TOP STITCH.

4. Then I opened both the front bodice and the back bodice up and with right sides together I sewed up the sides, making a ring.  The bottom of your bodice should still not be sewn!   Set aside.


Here you can see the top stitching


The Tiers

Now, make your tiers!  The following is a chart of the tiers and sizes I used.  I cut rectangles of the following dimensions:

orange
(cut 2)
6x22
yellow
(cut 2)
6x27
pink
(cut 2)
6x34
blue
(cut 2)
6x39
purple
(cut 2)
6x44

1.Sew each tier together on the short sides so that you make a ring.  You should have 5 rings of differing sizes when finished. (Unless using a ruffling foot.  In which case, only sew one of the short sides together)

2. For the next step, I used a ruffle foot on my sewing machine to save time, but if you don't have one, you can just use your basic gathering stitch:   Start with the yellow fabric, sew gathering stitches on the top and then sew it to the BOTTOM of the orange fabric.  Then take the pink and sew gathering stitches and put it on the BOTTOM of the yellow and so on.  Then hem it up.  

Putting it Together

1.To put the bodice on the skirt, sew gathering stitches in the orange fabric (first tier).  Then, place the bodice inside the skirt (right sides together) and pin and sew.  ONLY SEW THE OUTSIDE LAYER OF THE BODICE AND NOT THE LINING.  

2.Now we'll add the elastic in the back.  On the right side of the bodice back (so you're essentially top stitching)- stitch a line about 3/4 from the top from one side seam to the other.  This makes your casing.  Slide the elastic through and stitch in the ditch of the side seams to secure the elastic.  
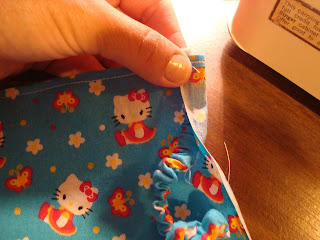
Here is where I "stitched in the ditch".  The back bodice is on the left and the front is on the right.


3.Next, turn the LINING under 1/2" and iron.  TOP STITCH the lining and the bodice together around the waist, thus hiding the seam of where the skirt attached. ALL DONE!! 


Wednesday, April 8, 2015

Cake Auction!

I recently participated in a cake auction.  Don't know what it is?  Neither did I!  My son's Cub Scout Pack uses this as a fundraiser.  We all make a cake and then get together and auction them off.  Pretty simple.  Tons of fun!  

We began by perusing pinterest.  Of course, my son wanted anything with a "poop" theme but I finally got him out of it by showing him different, yet equally "cool" ideas.  We finally agreed on this one.  I needed something that could be done fairly quickly and still come out pretty cool.  If you didn't notice, the link was in a foreign language.  I suppose I could have translated it via google, but I figured I knew how it was made anyway, so here is my super fast version of the "pigs in the puddle" cake!


Supplies:
Box of cake (any kind)
Frosting (for filling between layers)
10oz semisweet chocolate chips
2/3 cup heavy whipping cream
Kit kats
Ribbon
Fondant (I found some at my local grocery store!)
Food coloring (for the pink)

What I did:
1. Make 2 round cakes according to directions on box. (or use your own recipe to make two rounds)
2. Put a layer of frosting (or filling) on the first cake and put second cake on top.  I then frosted the whole cake- including the sides- with just the frosting.  You will make a ganache later so you may be able to skip this step but I figured I had enough frosting anyway so why not?
3. Then, open up your kit kats and make your piggies.  To make the piggies, I just eyeballed it and took a chunk of purchased fondant and added some red food coloring and played with it for awhile in order to get it all pink and made several balls.  We used a toothpick for the eyes, belly buttons and the butts.  The floating pig is made with a ball for the head, a ball for the belly and then 4 little balls for the arms and legs.  
4.  To make your ganache, put 2/3 cup heavy cream in sauce pan and slowly bring to a boil, stirring constantly.  Pour the hot cream over the chocolate chips and whisk until melted completely.  (I gotta say that my chips did not melt completely so I stuck it in the microwave for 1 minute-fabulous) 
5.  Then I poured some of the ganache over the cake and spread it out and on to the sides.  Put the remainder aside while you construct the kitkat barrel.  After I placed the kit kats around, I tied the ribbon to hold it together.  I then added the rest of the ganache and placed my piggies where I wanted them to go.   And you’re done!

I love how the ganache adds that shiny-looks-like-mud feeling to the cake.  
I added some grass around the bottom with just a little frosting tinted green and a grass tip on the frosting bag.  Pretty simple! 
Cute little piggies in the barrel!

Saturday, August 17, 2013

Emma's New Dance Bag!


It's finally here!  I finally finished.  Ok, to be honest, I got most of it done fairly quickly but then I had to wait to embroider it and then wait to have time to finish it up. But all that waiting was worth it, cuz it's so freakin cute!  See...

Look!  It's LINED too!


I LOVE this bag. There are SO many ways to spice this sucker up!  I'm still thinking of adding a bow in the middle and maybe a feathery thingy.  You could add more tulle and a LOT more ribbon!  Don't know yet...
Here's a quick rundown of what I did:
1. Cut two pieces of outside fabric and sewed up 3 sides, leaving about an 1 and 1/4 open on the end of each side
2.  Finished remaining 1 1/4 on the top of the sides by folding it over and folding it over again and sewing.
3.  Then I found someone really cool who helped me embroidered Emma's name on it. (try not to pay too much attention to the size of the letters- it was my first time with a machine!)  **Any decoration done to the bag should be done BEFORE you put the lining in it.
Here's a pic of one of the sides to try and give you an idea:

4. Then I gathered my tulle (just doubled the circumference of the bag) and sewed it on.  Followed that with some pom-pom stuff and then ribbon.
5. Then I marked the bottom corners where I wanted the grommets to go and cut out a TINY x through both layers of fabric.  Took out a handy-dandy tool  (ok- another friend loaned this one to me) and squeezed on the grommets.

6.  Then I sewed up two pieces of my lining fabric.  My lining pieces were cut slightly smaller (about a half inch or so-in height) because I wasn't going to be making the casing with the lining as well.  This is where I'd probably do things differently the second time around because it got a little wonky.  This time, I sewed all the way up both sides and then just serged around the top to finish off the top of the lining.
7.  I placed the lining inside the bag.  *The bag should be slightly taller than the lining.
8.  With the bag-only fabric I folded it over 1/4in and then 1 inch to make the casing for the drawstrings.  Make sure that you catch the lining in this step!
9.  Then I pushed the string through the casing with a safety pin and tied it on at the bottom on the back of the grommets.

All Done!!   Isn't it great?!


Feel free to contact me if you need any help.  It's such a fun project!


Sunday, March 10, 2013

Seat Belt Pillow Tutorial

My family and I are gearing up for a rather long car ride and in order to make it more comfortable, I was thinking of getting some travel pillows.  I looked online and I found these great pillows that attach to the seat belt so you can just lean over and be cozy.  Unfortunately, they were $25 + shipping!  If I wanted two, that'd be over $50!  Crazy!  So, being crafty like most crafty people are, I said to myself, "I can totally make that." So here is my tutorial for the awesome SEAT BELT PILLOW.  Enjoy! :)


First, I wanted to make these washable so I actually made a pillow and then I made a pillowcase with a zipper.  You can choose to do this or just make one pillow and stuff it and move on with your life.  I was just thinking that kids....um....drool and stuff.  
Secondly, these are not crash tested or DOT approved or anything like that.  I just wanted to make a pillow for the kids.  If you choose to make one, you do so at your own risk.  (I can't believe I have to write that crap)
Here's a closer look at the back of the pillow.  It has a velcro flap that encases the seat belt.  You can also see the zipper going up the long side of it.


Materials needed:
1/2 yard scrap fabric for pillow (I used leftover muslin I had around)
1/2 nice fabric for pillow case (I used fleece)
12-14in. invisible zipper
velcro (I used 1" wide and a 10" strip but that's just because that's what I had on hand)
polyester fiberfill- again I used what I had on hand but I'd say you'd use a fair amount to get it nice and firm
seam ripper (for the zipper insertion)

Ready, Set, Go!
First you have to make your pattern piece.  I just did this on the fabric itself because I'm kinda lazy like that.  I didn't even iron the lining fabric because who's going to see it?  LOL
 Crappy picture, I agree but I made a large 7.  You can make it whatever size you want but I just arbitrarily made it 16" along the top and 21" down the side.  It was 7" wide. Cut 2.


Ta-da!  I just cut it out and sewed around it.  MAKE SURE TO LEAVE A HOLE TO FLIP IT RIGHT-SIDE OUT!
Here it is all flipped and stuffed. I just sewed up the hole (black thread) on the sewing machine.
Now let's do the pillow case!
Cut out 2 more 7-shapes on your cover fabric.  (do this by folding the fabric over itself so you  have a front and a back 7) With right sides together mark (with pins) where you want your zipper to be on the LONG side of the 7:


REMOVE THE ZIPPER but leave the pins there.
Starting at the top sew a normal stitch until you get to the first pin.  Do a few back stitches then change to a basting stitch. ( a really long stitch) Baste all the way down to the other pin that denotes the end of the zipper.  Again, switch to your regular stitch.  Back stitch a little then continue to the end of the side.

Put the zipper back ON THE SEAM ALLOWANCES ONLY, with the zipper facing down.  Sew each side of the zipper on to each seam allowance.   A little tricky at first, but super cool.  


Once you have sewn on the zipper, close the seam allowance at the top and bottom of the zipper by sewing perpendicular to the seam.  That way no stitches will show.  I, of course, was having some camera issues at this point so I don't have a better picture.  :( 

Flip the cover to the right side and then rip out your basting stitches.  Like magic, the zipper will appear,  but no stitches will be seen!  Awesome! 

At this point, it's important to UNZIP the zipper a few inches.  Set the pillowcase aside.

Now, lets work on the velcro! Cut 2 pieces of your cover fabric 6x11.  On the RIGHT side on one piece, apply the ROUGH strip of velcro on the side.  


Now place your other piece of cover fabric over top, right sides together and sew up the top, the side with the velcro and the bottom.  Turn.

**Here's the tricky part. You need to visualize which side of your child the seat belt goes over- you can have a regular 7 or a backward 7 depending on which side of the car they sit on.  We have "places" in our car so each child sits in their own spot all the time.  If you can visualize this, the cover needs to be attached to the INSIDE side of the 7.  So, I suggest you put your pillow case out in front of you the way it will be worn on the child (right sides out) and then figure out where the placement of the coverpiece should be. It should be placed on the BACK of the INSIDE (opposite the zipper) of the 7.  Once you figure out which side of the pillowcase the cover should be attached to, BASTE it on (RIGHT side of 7).  (this is in case you screw it up anyway- which I did.  It was a lot easier to take out this way!)

When you think you've got the cover on right and it is basted on, then you can figure out your placement for the soft part of the velcro.  Mark it on the 7 with pins and then sew it on.  I actually sewed around the perimeter and then zig-zagged down the middle on both parts of the velcro. 

Almost done!  Now we just sew the whole thing together.  Make sure your zipper is slightly unzipped!!!  Align the 7s, RIGHT SIDES TOGETHER and sew up the remaining sides (sandwiching the velcro cover in the middle).  Turn rightside out through the zipper hole.  Shove in the pillow form that we made hours ago and zip up your pillowcase.  Place in vehicle and enjoy the peaceful snoring sounds of your children.  :)
Shhhh!


Friday, May 18, 2012

The Most Awesome Headband Ever Made

Okay, so I saw these head bands a long time ago in a store and tried them out.  It ended up being one of my favorite things to wear.  I loved it because it was such an easy and attractive way to do my hair.  I can never have a bad hair day when I wear these!  You can make them in any different fabric:  some of my favorites are bandanas and those cool "fat quarters" you can find anywhere that sells fabric. You could even make them in shiny satins for those "dress-up" days.

So, given the fact that this is my first tutorial, please bear with me and please let me know if you have any questions!


Materials needed:
small amount of fabric such as fat quarters or bandanas
elastic- I used 1/4" but depending on how thick your hair is, you might want to use 1/2"
basic sewing tools: measuring tape, scissors, pins, sewing machine, etc.

There are basically 2 parts to this headband: the wide part on the top and the fabric-covered elastic that wraps underneath. 

First thing's first: if you want it to be perfect, you should probably measure the person's head.  However, there is plenty of give in the headband so an inch or so really doesn't matter!  I measure from the middle of the ear on one side, over the top of head to the middle of the ear on the other side.  For my daughter, this ended up being about 11inches.  Don't forget to add an inch for seam allowances!!  Then you need to figure out how wide you want the band.  I just arbitrarily picked 6inches.

For the length of the elastic I measure around the bottom of the head, from one ear to the other.  In this case it was 9 inches.  Cut a piece of elastic to this measurement.  I found that doubling this measurement for the length of the casing over the elastic is probably the best way to ensure you have enough stretch in the headband to get over the head.  The width of this piece depends on the size elastic you're using.  Since I used 1/4" elastic, I made my piece 2" so I'd have plenty of wiggle room.

So this is what we have so far:

Now that we've gotten all the preparation done, let's sew!
I hate to say it, but you have to finish all of the seams on the large rectangle (my least favorite part!). If you don't do this, all of your hard work will be for nothing because your headband will fray terribly.   I actually cut this out on the selvage of the material so I just need to finish three out of the four sides.  You can use a serger for this stage but I found it feels more comfortable when you're wearing it if you make a hem.  If you're familiar with sewing, you are just making about a 1/4" hem on each side.  To do this, you fold over the fabric as little as possible, fold it over again on itself and then sew.  You can "finger press" which means you really don't need to pull out the iron and the pins, just fold as you feed it through the machine.


Now it's time for the elastic.  Fold your long piece of fabric in half length-wise, right sides together and sew about 1/2" seam.  Trim your seam allowance.  Turn right side out.  (OK-this can be a little tricky.  I highly recommend purchasing a tool made for this purpose!) Press.
Ta-Da!

Attach a safety pin to one end of the elastic and carefully feed it through your casing.  Just before the elastic disappears completely inside the casing, sew the end back and forth a few times to secure it.


Continue to thread the elastic through to the other side and secure the other end in the same fashion.

Here comes the fun part: with the RIGHT side of the large rectangle facing you, put one end of the elastic on one side, about 1/4" from the edge.  Wrap that edge around the elastic.  

Now fan the rest of the fabric BEHIND the elastic, accordion-style, leaving enough to wrap around to the front at the end. Holding onto this lump very well, shove it under your machine and go back and forth like crazy.  (Yes, your needle WILL sew through it!) Because this is not perfect, I like to sew as close to the edge as possible which usually ends up being 1/2" or so because my fan lump is uneven. :)

Repeat on the other side.


All done!

Here's another picture...

Good luck!
Let me know if you need help with any parts of the project.  Also I'm trying to think of a catchy name for these in case anyone has any ideas leave a comment!


My First Post!

So, here it is: my very first blog post!  I have finally joined the 21st century.  These are my first, very small baby steps to eventually posting and selling my handmade items.  Woo-hoo!  Spread the word, my friends! Please be patient with me while I learn the formatting and all of the other neat stuff I can do!  Because I'm not as creative as most others I find on these blogs, I will begin with my one and only original copy of something I saw in department stores years ago and can't live without now...The Get All of the Hair Off Your Face Headband.  Of course, that's not the official name of the headband but I'm still working on that one!